
Azure DevOps is the successor to Microsoft Team Foundation Server (TFS). It includes a build server (CI), version control (Git), manual test plan management, and artifact delivery (CD). Azure DevOps features can be enabled as needed.
STAY TUNED
Learn more about DevOpsCon
Setting up Azure DevOps
Now we want to develop an Angular-based web application using Azure DevOps as the build server. To be able to version and develop the build together with the software, the build configuration is stored in the YAML format as an Azure pipeline in the repository. To do this, it’s important to know that Azure DevOps currently only supports the YAML pipeline format for Microsoft’s own Git repositories at GitHub or GitHub or Azure Repos Git [1]. That’s why in our example, we will enable the Repos feature in Azure DevOps and use it as version control. For an Angular build, we first create a new Azure DevOps project (Fig. 1).
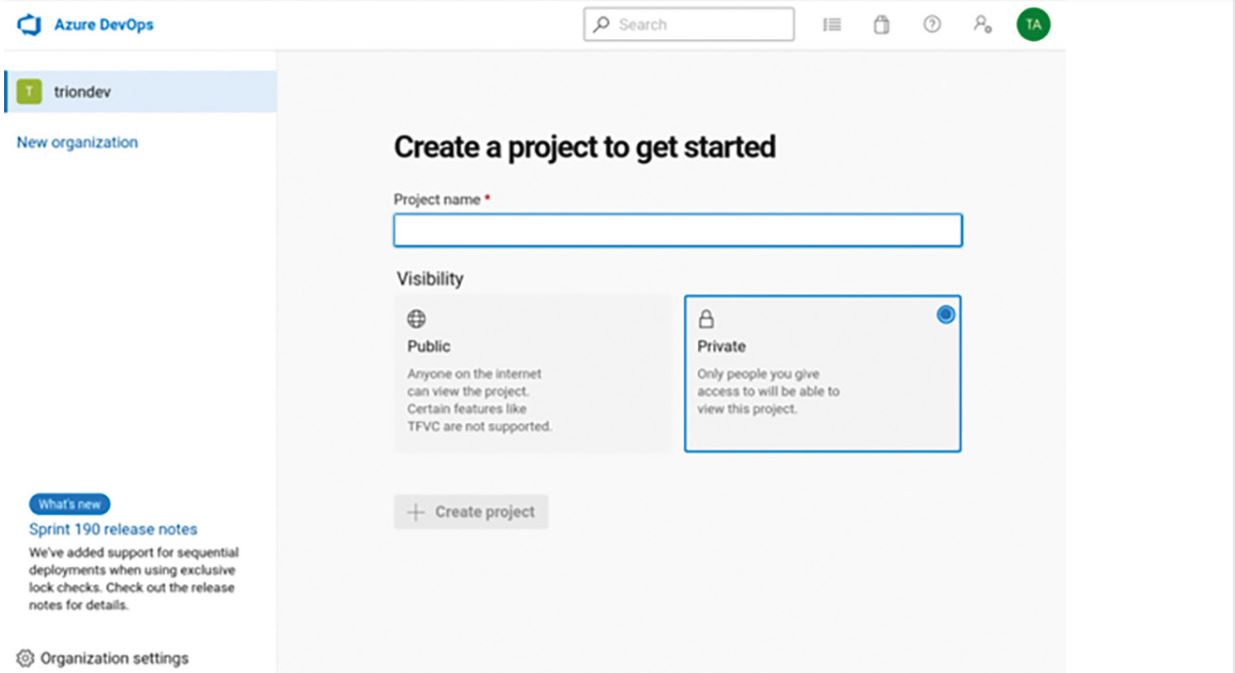
Fig. 1: Creating a project in Azure DevOps
If we use GitHub, then the setup is simple. For Git integration in Microsoft’s Azure DevOps, an empty project is created first. The repos feature can then be activated in the project settings (Fig. 2).
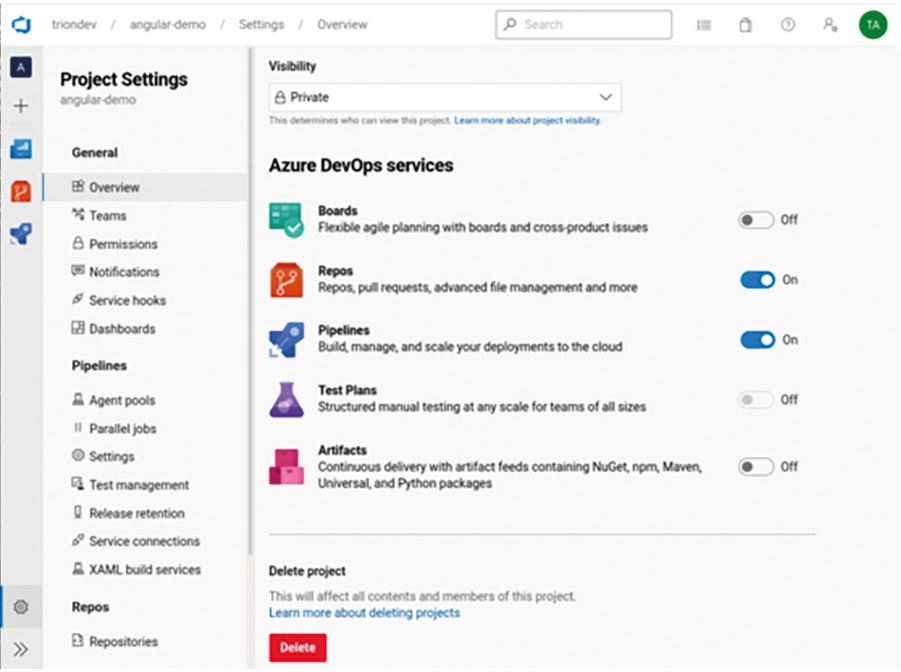
Fig. 2: Activate repos feature
Afterwards, a new build pipeline can be created. We select AZURE REPOS GIT (or even GITHUB) as the source for the source code (Fig. 3).
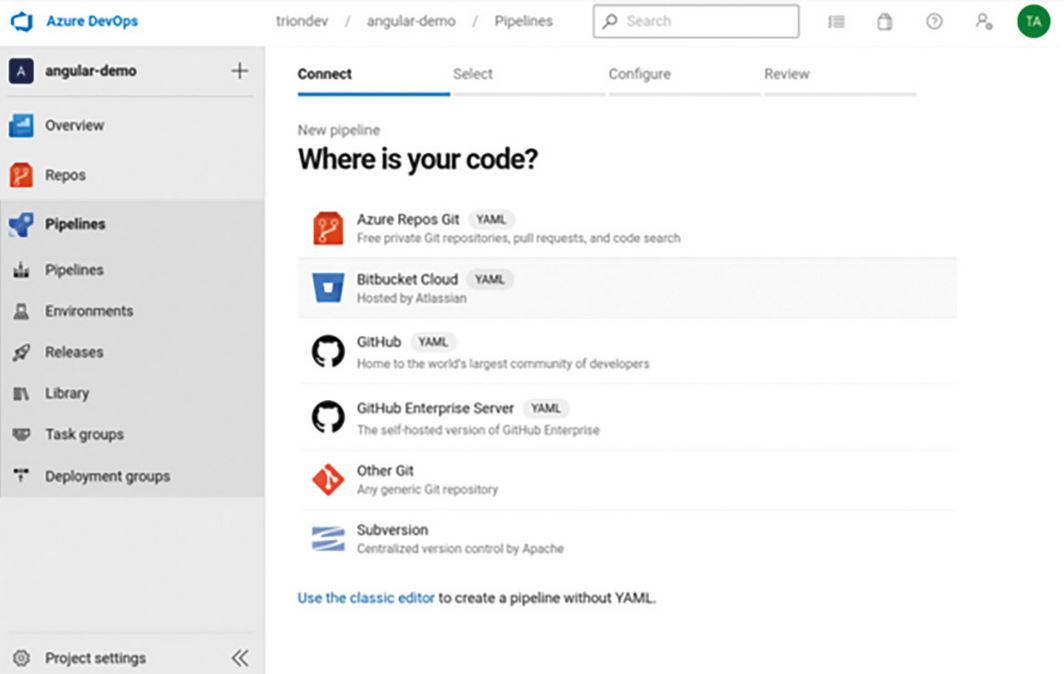
Fig. 3: Set up source code source
Azure DevOps YAML Pipeline
Then, DevOps connects to the version management and looks for the azure-pipelines.yaml file. The pipeline can be used to define steps that will be processed for the build. The pipeline is executed by agents. The platform’s configuration (Linux, Windows, and macOS are possible) is done with a pool that applies to the whole pipeline or a subsection. When using Ubuntu 20.04 as a build environment, it looks like this:
pool:
  vmImage: 'Ubuntu-20.04'
The actual build is represented by scripts or predefined tasks (Listing 1). The advantage of using scripts throughout is that they’re easier to transfer to other environments. This makes it easy to test the build sections locally on the developer’s computer and the Azure environment is not always required
Listing 1: Sample Build Steps
- script: npm ci
  displayName: Install NPM dependencies
- script: ng test --watch false
  displayName: Component tests
- script: ng build -c production
  displayName: Build app
Software for the build can be installed on the agents, for instance, Angular CLI or other tools. Since Azure DevOps allows the execution of (Docker) containers, this method is also suitable for deploying pre-built tools or service containers.
Docker Container
In principle, Docker containers can run in Azure DevOps Pipelines, but there are some special features to consider. Azure Pipelines want to create their own user in the container and use the useradd tool for this. That is why the image must provide sudo privileges accordingly so that useradd can be executed by normal users. Alternatively, the user used in the container can be given relevant privileges. The simplest solution is to start the container with the –user 0:0 option in order to have root privileges available in the container. Additionally, Node.js must always be installed in the container, as Azure Pipelines uses it to execute commands in the container. Containers that will be used should also be declared in the resources section so that container can reference them later.
For building Angular applications, trion/ng-cli-* images are suitable. It offers a versioned Node and Angular CLI version. Additionally, the trion/ng-cli-karma image contains a preconfigured Chrome browser that can be launched non-headless to run component tests with Karma, for instance.
Listing 2: Declaring Docker Containers
resources:
  containers:
  - container: trion-ng-cli
    image: trion/ng-cli:latest
    options: --user 0:0
  - container: trion-ng-cli-karma
    image: trion/ng-cli-karma:latest
    options: --user 0:0
  - container: trion-ng-cli-e2e
    image: trion/ng-cli-e2e:latest
    options: --user 0:0
The containers declared in Listing 2 can be used later at the job level. All steps are executed in the context of the container (Listing 3).
Listing 3: Using trion/ng-cli in Azure DevOps job
- job: install
  container: trion-ng-cli
  displayName: NPM-Install
  steps:
  - script: npm ci

Build content in multiple stages
An Azure DevOps Pipeline is structured by the following entities:
- Stages can be executed independently and in parallel.
- Jobs belong to a stage, can be executed independently and in parallel, and share a directory under special circumstances.
- Steps belong to a job and are executed sequentially.
The design aims at the highest possible parallelization and a fast build. This means that there cannot be any implicit dependencies between jobs or stages, as this can affect build stability or correctness. Explicit dependencies can be expressed at the job and stage level by dependsOn. If data from a previous stage or job is needed, then it must be provided separately.
In the exceptional case where there is only one build agent, jobs can access data from previous jobs. However, accessing data from separate stages isn’t possible without further action.
Node.js-based applications are typically loaded with npm or Yarn dependencies, but this isn’t completely new in every job or stage.
For this, Azure DevOps Pipelines provides the task Cache, which can be used to cache data and retrieve it in subsequent jobs or stages. This can even be done across multiple pipeline cycles. A cache key is used to find out if the cache can still be used. This can be determined from one or more strings or file contents. With npm, the content of the package-lock.json is suitable—if the dependencies do not change, they do not have to be retrieved again.
If it was determined that the cache can be used, then the contents are restored. Now you can set a variable that indicates the positive case and can be used in the following to decide if a step—in this case, the retrieval of npm libraries—should be executed or not. A condition assesses the variable’s value: In Listing 4, the ne stands for “not equals” and checks if the npm cache was provided. It’s important that this step is executed again for each job. Unfortunately, Microsoft’s support for YAML has been implemented incompletely: No references can be defined or used [2], so repetitions cannot be expressed as elegantly.
Listing 4: Using the cache in the pipeline
- task: Cache@2
  displayName: Cache NPM modules
  inputs:
    key: 'npm | package-lock.json'
    path: '$(Build.SourcesDirectory)/node_modules'
    cacheHitVar: NPM_CACHE_RESTORED
- script: npm ci
    displayName: NPM CI
    condition: ne(variables.NPM_CACHE_RESTORED, 'true')
As an alternative to the cache, a pipeline can also provide artifacts. These are results or intermediate results from the build that can be used elsewhere. The artifacts can also be used outside the pipeline: They can be conveniently downloaded via the web interface or used as a basis for building subsequent artifacts from (Listing 5).
Listing 5: Deploying a build artifact
- task: PublishBuildArtifacts@1
  displayName: 'Publish dist'
  inputs:
    PathtoPublish: '$(Build.ArtifactStagingDirectory)/dist.tgz'
    ArtifactName: 'dist'
The name of the build artifact is also the name of the folder that the artifact is deployed under. This is important to keep in mind when an artifact is downloaded in a subsequent job: The folder name is preserved and must be observed for accesses (Listing 6).
Listing 6: Use build artifact follow jobs
- task: DownloadBuildArtifacts@0
  inputs:
    buildType: 'current'
    downloadType: 'single'
    artifactName: 'dist'
    downloadPath: '$(Build.ArtifactStagingDirectory)'
Angular example project
You can find the complete sample project as an Angular application with linting (ESLint), unit tests (Karma), e2e tests (Cypress), and of course, the application build at [3]. In the sample pipeline, artifacts are created in two places: both in the build and publish stages (Fig. 4).
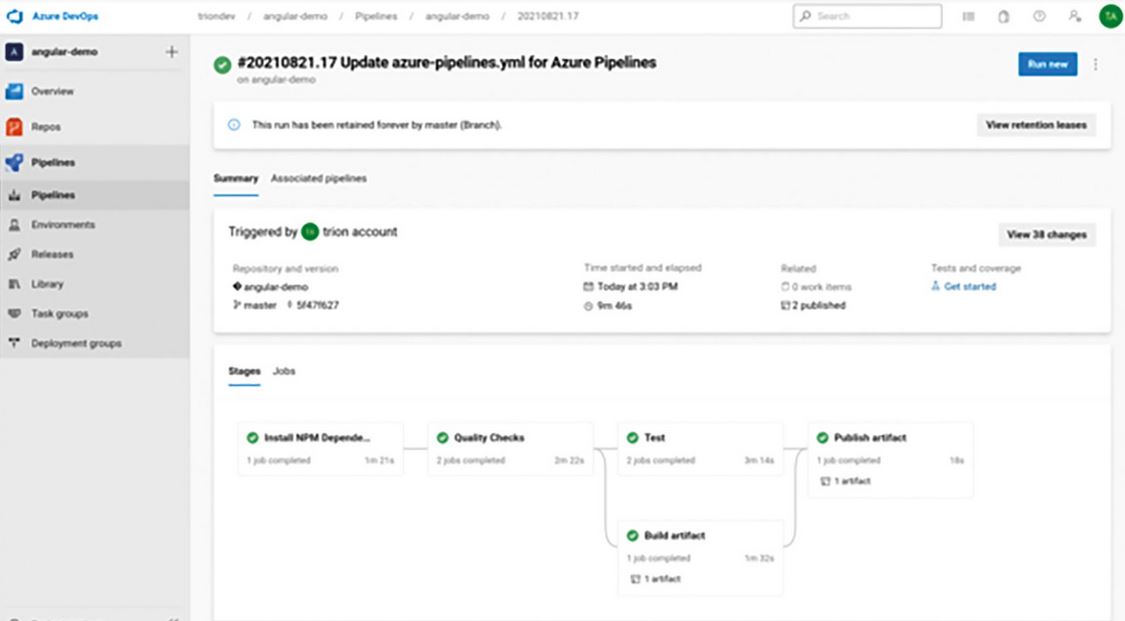
Fig. 4: Overview of the build and publish stages with artifacts
In the example, no benefit occurs from this procedure. Rather, it’s intended to show how artifacts are created in different stages for further use later. For example, in the final publish stage further elements would be added when the result is delivered to a customer, such as source code and documentation.
The sample pipeline could be extended in stages, such as building the Angular application as a Docker image and deploying it to a container registry. Another idea is creating reports of the test results and publishing them in Azure DevOps.
I wish you success building your own application with Azure DevOps!
STAY TUNED
Learn more about DevOpsCon
Links & Literature
[1] https://docs.microsoft.com/en-us/azure/devops/pipelines/repos/?view=azure-devops